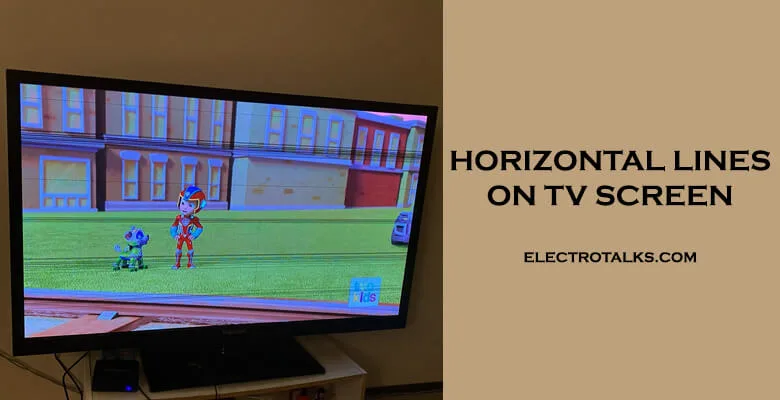
Are you worried about the inconsistent and flickering horizontal lines that appear on your TV screen?
I have gone through the same pain and I had to stop watching Netflix on my TV for a while.
However, you don’t have to go through this. With horizontal lines appearing on your TV screen, you can still hope to restore the image back to normal.
So, DO NOT THINK OF THROWING YOUR TV SCREEN AWAY!
Follow this article where I am gonna share some mind-blowing tips and you will thank me later!
Easy Navigations…
- What causes horizontal lines on the TV?
- A Quick-fix tips
- How to get rid of horizontal lines (step by step)
- Frequently Asked Questions
- Conclusion
What causes horizontal lines on TV screen?
A TV is an electronic device; hence a scanned system that develops horizontal lines to form a picture. However, the problem arises when some of these lines appear on the screen itself.
But in most cases, you can fix this within a couple of minutes; only if you know the proper techniques.
So before stepping right into the solutions, you should know where things are getting wrong.
1. Failed Gate drivers
Due to one or more defective double-ended row drivers or row electrodes, there appear horizontal lines on the TV screen.
Sometimes the connection between the row driver chip and the LCD panel’s TFT array gets ruptured.
Moreover, the display screen got COF drivers to turn faulty. In such cases, it is wiser to check the small ribbon cables on the panel board.
2. LCD panel damage
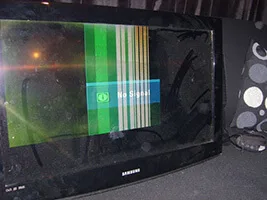
This is one of the most common reasons that cause horizontal lines on Display. Often you get it loosely connected to your row driver.
Since the LCD/LED panel is connected to your circuit board in a series connection, it entirely could have lost the connection.
Defective cables or graphic hardware system delivers broken signals to reproduce an image on the screen.
As a result of which you get to see those annoying lines on the screen.
3. Interference Issues
Then comes the interference source due to which you get to see those lines on your TV screen.
For instance, your breaker might develop interference issues. Again, dimmers might get defective.
In such cases, unhooking and re-connecting everything would be easier to find out the interference source.
You might be using set-top boxes or non-integrated sources. In such cases, check the HDMI cord is plugged on both sides perfectly.
4. Unstable connections
Since TVs are more often switched from one corner of your house to another, there is a sheer possibility of the video cables getting loosened.
Unfortunately, if you drop it (we often hang it on the wall) or bump over it then this possibility gets more acute.
Again, your TV screen works as a matrix where the driver electronics deliver signals that correspond to these horizontal lines.
So if it faces a broken or loose connection, a stuck line is developed. Moreover, a bad cable or poorly secured cable also disrupts the signals.
It gets unnoticed but often the connection between your TV screen and the printed circuit board gets loose.
And that ends up with these horizontal lines!
5. External Devices
If an external port/device is connected to your TV, then you must check if its connections and picture format settings align with that of your TV- the Aspect ratio, screen resolution, and scan frequencies because these are notable for the picture display.
You can follow the User Manual of the external device to manage the settings and reset, if necessary.
6. Faulty T-Con Board
Sometimes you will see colored horizontal lines on your TV screen. This mostly happens due to a defective T-Con Board.
The T-Con board is not supposed to work properly unless you fasten it securely.
And if you don’t find any loose wires or they work perfectly, then the problem is with the T-con board itself.
7. Interlacing
Have you ever heard of it? Interlacing is basically a technique that increases the expected frame rate of a video to double.
But it does so without taking any extra bandwidth.
For example- A basic TV set displays 25 even scans and 25 odd scans every second.
The faster your video frame rate gets, the lesser the time gets between each interlaced field.
In older TVs, the interlacing was more like this- for every image, it moves half from left to right and right to left for the rest half.
However, modern TVs use progressive interlacing, due to which these lines are visible sometimes.
Especially when the lens contains a shutter speed that syncs with these lines.
A Quick-fix tip to get rid of horizontal lines on the TV screen
If there are visible horizontal lines on your TV screen, you can give it a gentle knock on the sides where these horizontal lines would appear.
You might not believe it but a little wack on the back actually works!
Now if this trick works, then either your T-con board is faulty or the cables are loose.
However, this isn’t a permanent solution but it works in most cases. So give it a try!
How do I fix horizontal lines on the TV screen? (Complete Guide)
Now that we know a number of valid reasons, let’s learn the fixing methods so that we can easily get rid of this annoying issue.
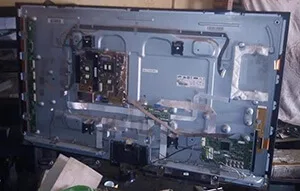
Open up your TV (It’s easy)
Yeah! It might sound like you are gonna tear up a mountain, but go through the steps I am gonna share below and you will be able to open your TV apart!
Make sure to have an open and flat surface to lay your TV face down once you unscrew it.
Warning: Make sure to unplug the power cord before you start working. If you have a standby light on your TV then that means you have standby voltage.
Again while disassembling it, you might get electrocuted as there might remain power in some of the TV parts- mostly capacitors.
The best way to avoid electric shock is to turn the TV off by unplugging it and wait for an hour to let the power inside get discharged.
I would also suggest using a grounded mat/strap while disassembling your TV.
1. Pull off the screws on the back of your TV using a screwdriver.
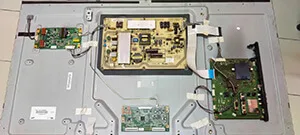
2. Once you open it, you will see a number of circuit boards and wires inside the TV- let’s say power supplies, transistor, T-con boards, IR sensors, capacitors (batteries), controller boards, signal inputs, inverters, and many more.
3. The data comes down from these tiny little chips on the yellow cables and is sent to the bottom of the screen one row at a time.
4. If you are taking a close look at your LCD, you can see the rows of red, green, and blue pixels, usually known as sub-pixels.
They combine together to produce the desired color pixel. You will notice the data lines coming down in between each subpixel.
A tiny piece of scotch tape saves you in the long run!
Displaying lines on the TV screen probably means there’s an LCD problem in there. You may be able to get rid of those lines using scotch tape.
So once you open up your TV, there will be a LED or LCD panel with two lines of joining connecting cables to the screen.
Using a tiny pc of tape on the ribbon cable, you can detour around the problem and get a good image.
Replace the T-con board
If your T-con board turns out to be defective, replace it. Because T-con boards directly control the LCD panel.
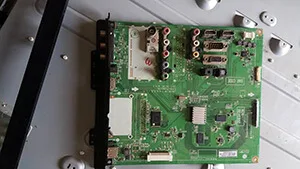
1. The T-con board is covered by a heat shield. Remove it and you will see the power board that supplies voltage to the main logic board.
2. Lift up on the latches on the T-con board and remove the ribbon cable connections carefully. Squeeze the sides and wiggle the connection off.
3. Don’t pull on the wiring and gently remove the T-con board. It may stick a little because of the remote pad.
4. Underneath it, you will find a stamp. Now press down on the new T-con board that you would like to replace.
5. Make sure that the thermal pad sticks are able to transfer heat from the T-con board to the chassis of the TV.
The thin lines of the ribbon cables should align with the latch otherwise your TV will end up having vertical lines all over its screen.
6. Squeeze out the sides of the plug. Make sure all the connections are flush and even.
7. Put the heat shield back on. Use a hand screwdriver because if you use power tools it might crack and damage the board.
Put everything back together, and plug in the power cords. Your TV might take a while to boot up so be patient.
Block the row signals
With some simple logic, you can easily block the row signals:
1. Take the T-con (time control) board to figure out where these row signals are. Otherwise, you won’t be having any clue as to which signals need to block.
2. The abbreviations are different in terms of different LCDs. In such cases, look for the abbreviations shortly mentioned on the panel(it is mostly written on the right side).
3. Use a multimeter in a continuity setting. It beeps when there is an electrical connection so you can easily find the corresponding set of signals since they are sent to both sides.
4. On the ribbon cable mark off the signals that you wanna block. Now cut the tape perfectly to match and cover over these contact points.
Now putting tape on this ribbon cable should get rid of the line. But the TV is designed to have both sets of signals cross over each row.
So we will be operating on one set. With this, the image might not turn perfect but you will hardly notice the difference.
The best thing is that the lines will be gone!!
But how would you know which lines to block?
Well, it either happens due to a short circuit or a major circuit.
Now if you block all the row signals on the ribbon cable yet are unable to get a good image then you can use trial and error and unblock them in different combinations and or one at a time until you get your desired image.
Troubleshooting
It is wiser to use a Display quality troubleshooter to determine the range of the damage before you think of replacing a new one. Here are a few troubleshooting steps you must follow:
1. You can re-seat the video cables if they turn out defective. Simply remove all the video cables from your TV and other sources.
Re-connect and check. If that doesn’t work, switch to a new cable. Here are a number of video cable options you can choose from.
2. Switch channels and check if the lines keep appearing on all channels. Switch to a different input source (HDMI, PC, and more) if that keeps happening.
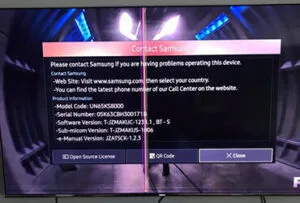
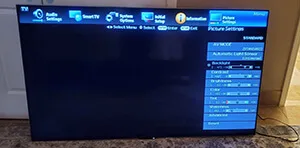
3. You can also run a picture test to determine if your TV is faulty or not. Press the Menu bar and then pull up Settings using the directional pad on your remote.
Now select Support>Self Diagnosis>Start Picture Test>OK.
It will show you a screen within which you will see whether these horizontal lines appear or not.
Click on Yes to continue with the test. Click on Show Again to view the screen again.
4. If the horizontal lines appear on the picture test, the TV itself could be defective and you need to consult a technician.
If these lines appear on specific channels, then there might be an unstable signal on those channels.
Check the Manual Tuning Mode on Settings to determine the status of the signal.
If it is weak, then check whether your antenna is in alignment with the signal (check the frequency setting).
If it is strong, then the channel is probably facing technical issues.
5. In case you are using a satellite dish or a cable box, disconnect it from the receiver to flash the memory.
Re-connect and check if the problem persists. Consult the satellite provider/cable provider for any kind of help.
6. If your TV does not include the Picture Test option, you can identify the problem using a USB drive. Try troubleshooting in the same steps explained above.
7. After you are done, switch OFF the TV and wait for 2 minutes. Turn it ON and check if the problem still persists.
Software Update Reminder!
Often the problem lies when the software is not updated. So updating software on a regular basis helps you to avoid those unwanted lines.
In case if your software is malfunctions or needs an update, check the manual of your TV to update it.
You should update your video card and graphics driver as well.
Conduct factory settings
Your TV might get incompatible with its image settings. Sometimes you end up getting confused with the settings adjustment and all.
In such cases, resetting your TV to factory settings often solves the problem for good!
Remember this: Whenever you hit the re-set button, all the settings of your TV will turn back to Factory default. This includes the removal of your pictures, audio, timer, and other settings. So write down the important settings before you start.
Wondering how to reset factory settings? Follow these steps:
- With your TV remote, press the Home button and then move to Settings.
- Now select Support>Self Diagnosis>Reset.
- Enter your TV Pin. The default pin is either 0000 or 1234.
- With a warning message that all your settings will get deleted, there will appear the Factory Reset screen.
- Select Yes and you are done!
- Let your TV perform re-boot.
Stable and Uninterrupted Power Supply
You read it right!
Sometimes you will see green horizontal lines appearing on the middle of your TV screen. This mostly happens if your power supply is fluctuating as per the needs of your TV to function smoothly.
In this case, it is observed that using a stable and uninterrupted power supply puts an end to this annoying problem.
Hopefully, these tips would work perfectly for your TV. Wouldn’t it be worth it if you could fix it yourself and extend its longevity for a few more years?
However, there are repairable and irreparable problems as well.
So, if you have tried all of these steps and yet there are visible horizontal lines on the TV screen, take it to an authorized service center to repair or replace it with a new one.
Having a warranty in this regard is a bonus point!
If you are planning to replace it with a new one, do consider the tenure period of your TV along with the repair charges and all.
if you are finding a most trustable power supply then check the uninterrupted power supply for home
Frequently Asked Questions
Since we are talking about disassembling a TV, I often get asked by people about some basic things which I’d like to share here.
What is a T-con board?
In simple words, T-con or Timing Control Board regulates the timing of the image pixels on your TV screen.
It is the only active element within the display; that performs the function of controlling the logic gate for the LCD panel.
The clock signals from the T-con board tell the transistors in a specific row to turn on one row at a time. When they are on, they accept the image data that is sent to them.
What is a Picture Test?
A picture Test is basically an activity through which you can identify if there is an issue with the TV screen.
This test basically shows you a higher quality picture and you would be looking out for flaws and defects within it.
Conclusion
I have covered all the possible reasons as well as effective solutions on what causes horizontal lines on the TV screens. Try these solution methods and let me know if they work in your case.