“As an Amazon Associate, I earn from qualifying purchases. Without Any Extra Cost to You!”
Most of us use washing machines just to make the washing process easier. The feature of automated water filling up is very useful unless it overflows. Many users face this problem due to some simple reasons. The problems may be very simple or could be much worse. Whatever the problem is, it is very annoying. We know, how would it be felt if you see your washing machine overflowing with foam and water.
We know, as you are reading through this article, you are facing this unexpected problem. Maybe this is the first time for you to suffer this problem. But we would like to assure you not to worry at all.
In this article, we will be providing you with some significant steps that are going to help you with the overflowing valve. We won’t say the steps are very easy but they are very useful. They might take some time to do but it is worth it.
If the water delivery mechanism of the laundry machine does not stop or one of the plumbing equipment has to be fixed, you may need to shut the water down. The easiest thing to do is to do this on the valve nearest to the problem. This will provide a working water source for the remainder of the property.
Similar to this, we will be discussing more other problems with the washing machine water valve and solutions. Stay tuned;
Solving Washing Machine Water Valve that Won’t Shut Off

You might be interested in the best electric pressure washer for foam cannon
Excessive water flow is dangerous and may produce a lethal accident. We shouldn’t work with a washing machine having this trouble. Any machine either a washing machine or dryer may encounter difficulties in running. But, we should fix it as soon as possible before it creates any hazard.
Here we will be discussing 6 very common steps that are mostly recommended by professionals and experienced persons. This might not take much time to read through. You can even start fixing it while reading. But we recommend going through it thoroughly, which will help to understand the steps more clearly.
Before getting started you are going to need some tools.
- New water inlet valve (Only if needed)
- Pliers
- Bucket
- Flashlight
- Screwdrivers
- Multimeter
Let’s get started;
1. Disconnect the power supply
This is an obvious step. Before filing any electronic equipment, you must disconnect it from its power supply line. Switch the warm and cold water valves off the water supply hoses on the side of the building.
Place a bucket on the ground to gather water from the pipes. Disperse the washer’s water supply pipes with a pin to remove the ties. Attach every pipe’s loose end to the bucket so the water drains from the pitch.
2. Check the valve connection type
A washing machine water valve connects to copper plumbing pipes in one of two ways:
- Compression fitting: We recommend that you employ a plumber to turn off if you have an old house with galvanized pipes. The old valve may seem simple enough to turn off and screw on a new one. But, if this ‘simple’ plumbing job will turn into plumbing clothing if the rotor is rustled internally or if the threads are rotted. These directions do not work if your home is plumbed with a PEX or a rubber conduit.
- Sweat fitting: If the connection function has been established, purchase a quarter-tour shut-off ball valve to accommodate the copper pipe and the tubing supply connection capacity. When substituting for a sweat valve, a torch, flux, solder, emery cloth, wire brackets and a flame retardant cloth would be required for you to secure the wall. It is also a fine idea to repair an obsolete supply tube and a rugged guardrail.
3. Clogged filter screens
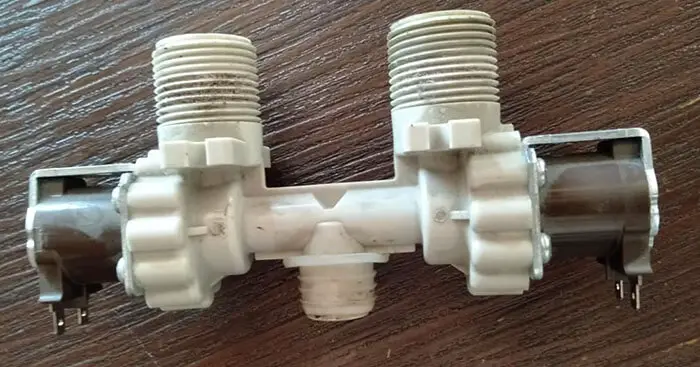
Blocked screens for filters are a frequent explanation of why a valve will fail and clean it quickly. Using a torchlight on the water inlet valve within one of the two ports.
A panel inside the port should be shown. If they are dusty, gently wipe the screens. Make sure you don’t break the screens so they cannot be substituted.
4. Solenoids test
Do a multimeter follow-up test on the solenoids by touching one tester probe to one of the two terminals on each solenoid. Any resistance should be shown in the reading.
If the reading shows zero resistance, the solenoid is damaged and the valve must be replaced. Test the two solenoids independently. If both are incomplete, the whole valve must be removed.
5. Connecting the new Valve

Discharge the attachments which secure the valve into or back of its cabinet. Note and mark the color and location of the wires connected to the solenoid. Break the wires by pushing the plugs apart.
Disable the intake valve from the inner tubes that send water to the washer. This is typically sealed with a hose clamp that you loosen with a screwdriver or lock, depending on the type. Installing the latest valve by reversing the disconnection method.
You may be interested in a duet washer won’t turn on
6. Check the new valve
Let the water run through the new valve and check if you can find any leaks. There shouldn’t be any. Now, run a full process of washing clothes. See if the valve is stopping the water after a significant amount.
If everything’s the way it should be, close up all the components and there you have it. Your water valve is fixed as new.
Some important FAQs About Washing Machine Water Valve
Read through these questions and answers, if you still have any confusion about the above discussion. These might come in handy;
- Why does Washing Machine Water Valve fail?
In an old shut-off valve, the most frequent malfunction is the convulsion. The valve is so corroded in serious situations that even a couple of pliers have little use. The rubber stoppers or screens in the valve degrade and do not minimize water flow entirely. Another recurrent loss.
- The minimum lifespan of water shut-off valves?
Ok, it is mainly attributable to redundant pieces, as in the previous example. The pull-down part of the valve that actually stops the water appears to malfunction after 8 to 10 years of or sometimes only one uses installation.
- Can you shut off your water supply while you are away?
It’s safer to turn off the heater and the primary water source while you go on holiday. If you turn the heat source off (gas, electricity), when away, your heater will not hurt.
- How to turn the main water supply off?
Switch the plug, which is normally located in the kitchen or bathroom, off the cold water source. It is a brass valve on each side, with a water drain, which is like the illustration shown. Only change the tap in the direction of the clock to shut the water.
Conclusion
No one should face the problem of overflowing. It is very pathetic as well as dangerous. As you have gone through the whole article, we assume you were also facing this problem. The above-mentioned steps are very easy to operate. Doing it by yourself will save you both money and time. But if you feel so, do please take the liberty to call upon a plumber.
We hope this article was of great help. Good Luck!!
