“As an Amazon Associate, I earn from qualifying purchases. Without Any Extra Cost to You!”
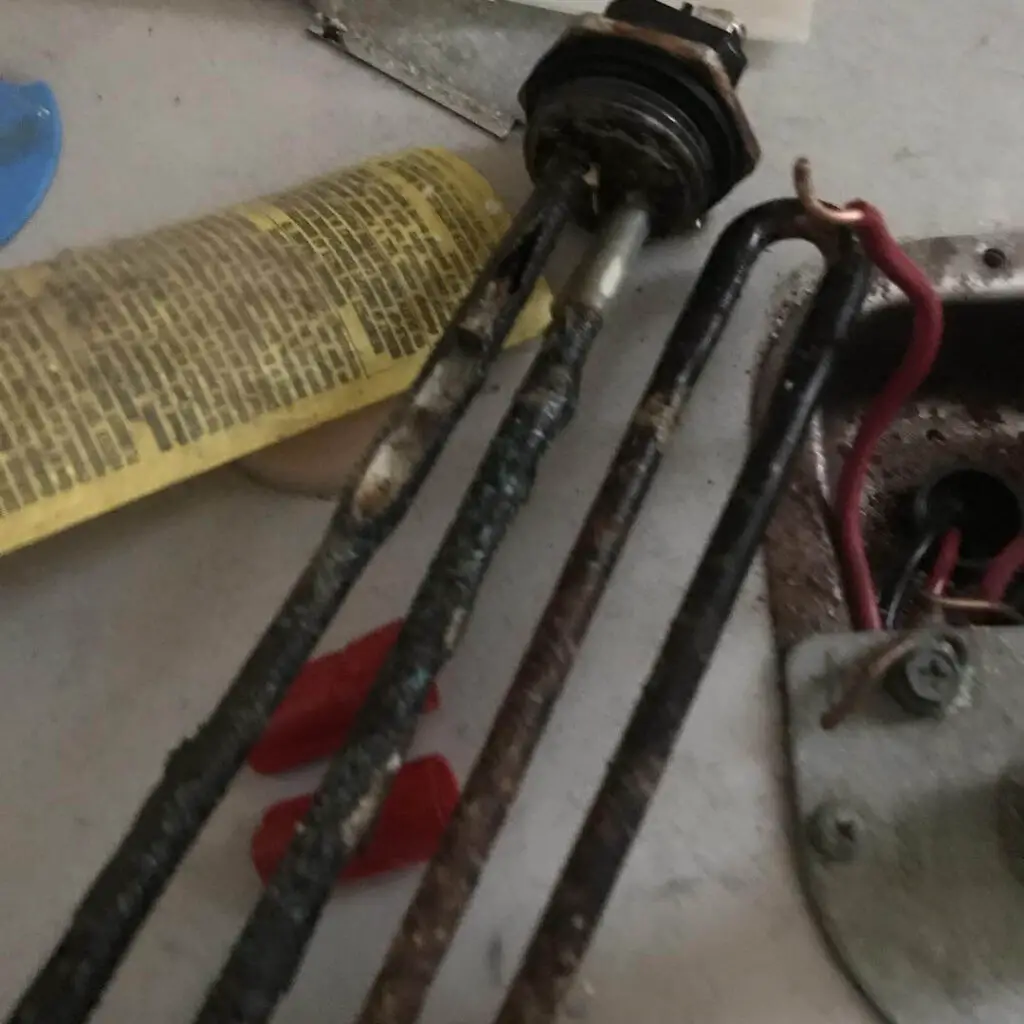
A rusted Water heater element can be the reason, water is not getting as hot as it used to be or you’re not getting hot water at all.
A bad heating element may be the culprit in your electric water heater. This rusted water heater element may cost you more electricity.
The fun fact is, this rusting issue is very common with every water heater. AS the element is directly involved in warming the water, it comes to contact with it. So, if your water heater element is rusted, don’t worry, just remove it and replace it with a new one.
Now, removing the element can be a bit difficult for someone who is not experienced. And if you have searched for this, you might be facing this problem.
The removal process of water heater elements is relatively easy than it is thought. In this article, we will be explaining all the possible ways to remove a water heater element. Following the steps accordingly, you will also be able to remove it on your own.
It would be a little challenging to remove a water heater element, especially with no element wrench. Most experienced plumbers have claimed that a stuck part can’t rotate with ordinary grips or clamps.
Most experienced plumbers have said that breaker bars may also be an option. They are hollow steel cylinders, which often fit well over the clamping handle of the heater.
These products will often, but not constantly, eliminate stubborn and trapped components.
Just like this, we are going to explain some other ways to remove the element from the heater. If you are not in a hurry, just go through the whole process and we guarantee that you will have visible results. Let’s get started;
How To Remove Water Heater Element That Already Rusted Or Damaged
Within this article, there will be 9 important steps to remove a rusted water heater element. A rusted water heater element is very disturbing in many ways. And removing it could a difficult task, as we mentioned earlier. Let’s not waste any more time and straight get down with the process;
Tools you may need
Without tools, this operation can not be done, and as per professional advice you may need;
- A new water heater element (Obviously)
- Voltage tester (if there is any electricity )
- Water heater element wrench ( other wrenches may not be appropriate)
- Screw Driver
- A hosepipe ( for draining the water)

1. Turn the water heater power off
When operating on a water heater, you must always disable electricity. At the disconnector, electrical systems may be turned off, while gas ones have a button or dial. Two independent breakers should be carefully placed in the boiler.
Wait for the water to cool down in the container. This is very important since the heater elements work off a thermostat, and the electric flow of hot water through the heater elements would be influenced by the tank.
It is necessary to ensure that no power is present when the water heater element is removed. Using a multimeter to measure the wire until you start. Because you are not aware of your electric water heater is disabled.
2. Drain the water heater
Using a hosepipe you can drain the water that is left in the tank. Doing so you will be sure of if there is any clogging. It is only important to drain the device to a point underneath the part, but it is a good idea to flush the tank entirely whenever repairs are made.
This adds to the removal of sedimentary layers and extends the lifespan of all the elements. Turn on the warm water rope nearest the radiator to empty the device efficiently.
You may interested into water heater won’t light fix
3. Turn off the water supply
While working, you won’t want the water to get in accidentally. So make your that you have turned off the water supply. By shutting the inlet valve, which we always see over our water heaters, you can cut off the water supply. By opening the nearest robinet and opening the hot water tap you can complete this move.
4. Test the Heating Element for electricity
To verify the heating element of a circuit, set a multi-test setting to the OHMs, attach the red plug to one end of the screw and the black plug to the other end of the screw on a heater.
There is no electricity flow through the heating element if the ohm readings are 0 in a digital network. This shows that the heating system is unreliable and needs to be replaced.
5. Lubricant the Rusted Element
Develop half vinegar and half water solution in a tiny cup. Place a toothbrush between the seam and the heating tank side and brush it into a solution. Apply the solution openly, just don’t let it drop heavily. Enable 20 minutes to settle down. This homemade lube will help you to remove the element easily.
6. Remove the Rusted Element

Then uninstall the heating element. The next thing. To extract this component, we must use a heating element clamp. The only key that can extract this component precisely is this aspect wrench. Professionals do not propose using an alternative to remove this part, as standard wrenches may be destroyed.
Element Type
# Screw-in type:
Removal of the screw-in heating system with a socket wrench and 1 1/2-inch socket to counter-clockwise. Any repair kits include a heating factor connector. Remove the gasket which sticks the heating element to the tank.
# Flange-type:
Remove a heating element of this type by removing the four screws holding in place the element. Take the joke away. Removal of the heating element from the water heater tank by cutting mounting screws and gasket. Place the socket over the heater and try to turn it in the clockwise direction.
To start spinning the heating part, tap the handle of the socket clamp with a hammer. If the heating element doesn’t budge, slip the breaker bar over the clamping handle. If you switch the key with the bar, you might ask a buddy to place the head of the socket key over the heating part.
Then, by opening our water heater drain valve, we can drain the tank. Depending on the size of our water tank, this phase could take an hour.
7. Prepare new element
Clean the new element and wash it out. You must ensure that no bacteria or waste is passed to our water heaters. Then mount the brand new “O” ring to our new heating unit.
Still change the rubber gasket to avoid leakage when removing the water heating element. Insert the gasket around the base of the element’s flange on the threads of a screw.
Displace the part in a narrow finger and then use your clamping factor to tighten it up 1/2 to 1 more turn. Remove the holding bolts for flange units.
8. Refill the tank and replace the cover
Once you are done with all the “Element removing” steps, it’s time to refill the tank and put back all the necessary components. Turn on the heater water source, and close the drain valve. We do not propose to enable the power supply instantly at this time.
Before turning on the electricity, we must ensure that our tank is full. If there is a leakage, check the newly mounted part. If a leak has been detected, turn off the water supply and tighten the element with the main element. Even the “O” ring may also be substituted.
Only the thermostat, isolation, and panel cover can be replaced until the refilling is complete. If you are done substituting cover, our water heater supply will eventually be turned on with our disruptors.
We note that when we open our rockets because of the air within the water heater, there is an erratic water flow. In a short time, this dilemma will go down.
9. Power up the Heater
Restore the wires to the new element(s), meaning that the right wires are not cut to the same terminals. Turn on the disruptor and inspect the boiler.
Replace the plastic protective deck and cover the access panel without any evidence of leakage. Let the water heat up for a couple of hours and then measure the water temperature. Provide the appropriate thermostat modifications.
Important FAQs about Removing Rusted Water Heater Element
Even after the elaboration above you might have some questions in your mind. We have arranged some in this section. Go through them, they might come in handy.
- What size of the socket is needed to remove a water heater element?
The drive socket is a 1 1/2 six 1/2 point. You’re probably going to need six to ten in. A broker bar and extension. Here is a photograph of the replacement method for the water heater.
- How tight should a water heater element be?
As much as you can, tighten it and give it another curl. Using a clamp to rotate the unit clockwise until it’s close because it’s a screw-in heated element.
- Reasons behind heating element burning out in a water heater?
The key explanation for burning out elements is DRYFIRE in modern water heating systems or new substitutes for elements. This is because a hot water faucet is not installed by the installer when the heater tank fills with water and therefore purges or bleeds air from the system.
- Do a water heater element last for?
It’s normal 10 years. It takes about 6-10 years to complete the anode rods. If you replace the anode(s) roughly every 6 years, the heating elements would take about 20 years.
- The most common problem with water heaters?
The most popular and frustrating problem with water heaters. A broken drain valve can be caused by too much tank friction, corrosion, rust, or condensation.
Conclusion
A water heater element does not get rusted now and then. But once it starts to, it is very difficult to maintain the water quality and electricity cost. If you have gone through the whole process then you already have the idea about removing a rusted water element.
These steps are something that you can easily do by yourself. But if you feel so, you can call upon experts who are more experienced. But doing it by yourself has many benefits including having new experiences, saving money, and time consumption.
Follow the steps and remove your rusted water heater element. Good Luck!!
