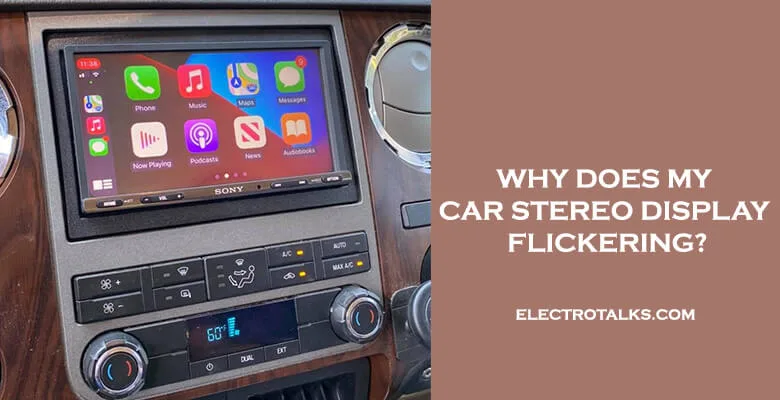
Last week, I planned a long drive with my GFF. We packed our stuff and started early listening to our favorite Stereo Hearts on my new car stereo.
Everything was going smoothly until my car stereo display started flickering out of nowhere. It kept flickering every 5-6 seconds.
I was continuously tapping it to make it work. I was dumb and annoyed more than anything.
It was so frustrating because I had just purchased it recently.
Anyway, that drive was so-so. I rushed home and guess what!!!
I fixed this issue myself. It just took a few minutes!
Now I am here to share my hacks and help you solve your car stereo display flickering for good.
So no more worries and let’s get started!
Easy Navigation…
- Why does my car stereo display flickering?
- Quick fix Method for Stereo Display Blinking
- 6 hacks to solve your car stereo display
- Tips for maintaining a car stereo display
- Frequently Asked Questions
- Conclusion
Why does my car stereo display flickering?
Well, there could be a number of reasons for your car stereo display flickering.
In most cases, it is seen that the wire gets fused or loose. Either the fuse gets burnt out leading to damage to the stereo circuit.
Or they become loose and get discarded from the stereo circuit.
Other reasons include:
- The cheap quality of the stereo itself- especially the modern android ones. Since they are technologically more advanced, they get prone to electronic malfunctions more often. A high-quality stereo is proven to be longer-lasting than that of those cheap ones.
- The connectors might get disrupted between the LCD and the radio unit which indirectly contribute to your car stereo display flickering.
- Faulty backlight or LCD
- Faulty dimmer on the radio
All these might sound a little tricky but trust me it just takes a little effort to fix these problems!
Check this guide about radio volume keeps down
Quick fix Method for Stereo Display Blinking
Here’s a quick-fix method to stop your car stereo display flickering in an instant!
Pull the stereo out and tighten all the loosely held wires that are poorly connected to the circuit and you are good to go!
Sometimes the fuse needs replacement. In that case, check these fuses which might solve your stereo display flickering for good.
Plus, they are super affordable and you will get a fuse holder free!
Follow these hacks to solve your car stereo display flickering in an instant!
Before we start talking about solutions, I would emphasize highly on your safety measures.
Since you would be working with the active cords and sockets, please be careful otherwise you might get electrocuted. It’s really dangerous with the electric shocks and all. So first things first! Turn off your car and remove the keys from the ignition switch.
1. Look for the gloves box
Often the car stereo comes with an adjacent gloves box which makes it easier to pull the stereo out.
You will also get a radio removal tool. If you have lost it or don’t have one (because I have lost mine), a pin or your car keys would work great!
Stick it in both the corners, swap the stereo and pull it out. Initially, you are good to start!
2. Double-check the power and memory lines
Take a close look at the power and memory lines with the help of a flashlight. Check if they are connected properly to the back of your stereo.
In case you get confused with the colors because that happens to me a lot; the red one is the power wire whereas the yellow one is the memory wire.
If you see any of these wires busted, do replace them the first thing.
You may be interested in a car cassette adapter not working
3. Don’t forget the radio amp and the Illumination wire!
If fixing the memory and power cords don’t work, come over to your fuse box and check which one of these fuses is for your radio amp lines.
Once you find it, pull it out and check if it is connected well.
The same rule applies in the case of illuminating wire. This is another probable reason for your car stereo display blinking.
Make sure to check if the illuminating wire is connected in a loose manner.
If it turns out to be held loosely and unwrapped, unhook it and re-connect to your stereo using a wire twist cap.
These caps work better than those random electric tapes.
Another tip: Take your flashlight and closely inspect if these wires have any liquid materials spilled around.
They will never work smoothly unless they are completely dry and dirt-free.
4. Take a close look at the stereo socket
This part is really important!
Sometimes the memory line tends to get loose at the battery as it is hot-wired. This also leads to display flickering.
Hence the stereo socket should be checked thoroughly to ensure that there is no internal damage/deformation in it.
Then comes the ground wire (the black one) which also tends to get loose more often.
All these loose wires around the socket and what to do?!
Well, a screwdriver and a spark of fire around the socket will help you tighten these wires in an instant.
It barely takes a minute!
If you are out of screwdrivers, grab a durable screwdriver set from here.
5. Inspect the demo mode (for manual car stereos)
If your stereo is a manual one (those are old-school gems!), and the display starts flickering, scroll the menu button unless you find a “demo mode”.
Check if the demo mode is turned on. If it is on, turn it off and confirm it.
Get back to your Menu scroll bar and turn back to the Home screen.
If there is no major problem in your car stereo regarding the fuse, then this hack should definitely work!
6. Don’t miss out the dimmer and LCD connectors of the stereo
The dimmer is basically used to adjust the brightness of your car stereo.
While reviewing the stereo, you should check whether there is a problem with the dimmer.
Cheap quality car stereo dimmers, when used randomly, start malfunctioning. This could also be a reason for your car stereo display flickering.
In the same way, check if your LCD connectors are good or not.
Once you are done tightening the wires and aligning them with the connector and the circuit, turn your car ON and check if the flickering has stopped or not.
In most cases, the above tips will make your car stereo display stop flickering. It worked perfectly in my case as well as with my fellow mates.
However, if none of these hacks work for you, don’t panic. It just means that your stereo needs a clean replacement by a professional.
If you are looking for a replacement, check this best car stereo
Tips for maintaining a car stereo display

With the solutions specified above, I hope that you are already out of this annoying problem.
Now I am gonna share some tips from my experience.
These tips will not only help you to maintain a sound stereo display but will also help to avoid such issues in the future.
Avoid aggressive driving on the road
I get really excited and drive roughly on highways. My friends yelled at me but I hardly cared.
Due to aggressive and harsh driving, the wires connected to the stereo socket might get loose and moved from their places.
Ultimately that creates a spark and your car stereo display keeps flickering.
Harsh driving is dangerous as it triggers your safety issues. In that case, please avoid rough driving on the road.
Clean the connectors between the unit and the front panel of your car stereo
It is highly recommended to clean the connectors between the unit and the front panel.
Often they get blocked by the entrance of dirt or any harmful particle in the stereo itself.
If you check these connectors often, you must know that they get dirty after a while.
In extreme cases, corrosion and rust take place due to the presence of dirt.
So make sure you clean them every now and then.
Avoid excessive cleaning
Yes, this is totally important! Maintain cleanliness but never go overboard!
Your car stereo is more of an electric device that is vulnerable to excessive pressure and of course, water!
The loose wires, the dimmer, LCD and the connectors might get ruptured if you apply too much pressure while cleaning them.
Instead, be gentle while cleaning. Take some cotton pads, dab them in alcohol.
DON’T SOAK BUT DAB!
Clean the wires, stereo socket, connectors, and panels by rubbing them gently with the cotton pads.
After you are done cleaning, wait for some time and re-organize your stereo gently.
You will also get a manual where the instructions regarding the cleaning procedures must be written.
Do take a look at that before you start cleaning.
Frequently Asked Questions
How do I identify the right wire of my car stereo?
This tricky thing pisses me off! Even with the manuals and instructions, I end up misplacing them.
After a number of failed attempts, I found a simple shortcut method to remember the color names. You can easily memorize it.
Here’s a simple and easy color guide for you!
Red– Power wire
Yellow– Memory wire
Black– Ground wire
Blue– Antenna
White– Amp
Orange/Pink– Illuminating wire
What should I do when my car stereo display doesn’t work at all after cleaning?
First of all, go easy with your cleaning. As I mentioned earlier, excessive and harsh cleaning will increase your problems with the car stereo.
If you see the car stereo display stop working, pull it out as per the above instructions, inspect the wires and gently set it back again.
Turn it on and go through the user mode settings and reset (you will lose your saved data though). If it still doesn’t work, your only option is to get it to a repair shop.
Conclusion
Fixing your car stereo display problem isn’t a big deal if you know the proper techniques. It’s simple and trusts me when I say, these hacks work in most cases.
However, if you follow these tricks and yet your stereo refuses to cooperate with your efforts, take it to a repair shop. It just needs professional help or some replacement.
I hope that these tricks work for your car stereo display flickering and you get rid of this problem as soon as possible.